Showing posts with label tutorial. Show all posts

Saturday, March 2, 2013

The Luck of the Irish

Hi there my friends...

This is the month to celebrate GREEN, Lucky day and the Irish in each one of us ... and I thought I start with wishing a little luck to each one of you...

And what best to bring good luck than a cute, easy and quick pattern for you to make your own charming SHAMROCK?


I looked everywhere and I found many different shamrocks, but I couldn't find just the right one for what I was looking for...
Just the right size and the way I envisioned...

I wanted to make some book markers for my friends and little pins to wear on St. Patrick's Day ... and if you know me when I cannot find exactly what I wish...
I just make it ... 

when I finished making them I loved it so much I thought I would share it with you ...

I feel so LUCKY to have you here with me and hope you enjoy this tutorial.

LUCKY SHAMROCK TUTORIAL

Here is a pattern to make a shamrock pin which can also be used as a book mark with an extended chain added to it.
They make great gifts and you will be protected from being pinched if you have it pined on your clothes on St. Patrick's day :) :) :)


Materials:
Cotton yarn in Dark green and a contrasting/lighter 
 green of the same or a little thiner cotton yarn.
Crochet thread on a contrasting/lighter color of green (optional)

Hooks: 
4.00 mm (US G-6) 
5.00 MM (US H-8)

Abbreviations:
(please note that I'm using American Terms to write this pattern)

ch   chain
rep   repeat
sc   single crochet 
sl st   slip stitch 
hdc   half double crochet
tr   treble crochet
mc   main color
cc   contrasting color


With size 5.00 (US H) and 2 strands of cotton mc  start by doing 5 ch and close to make a circle


Then make *4 ch, 3 tr and 4 ch and sl st into the circle *


 Repeat from * to * 2 more times ...


Now get ready to make the stem...
Ch 5, 1 hdc in the 2nd ch from the needle, sc in the next 3 ch, sl st in the last ch
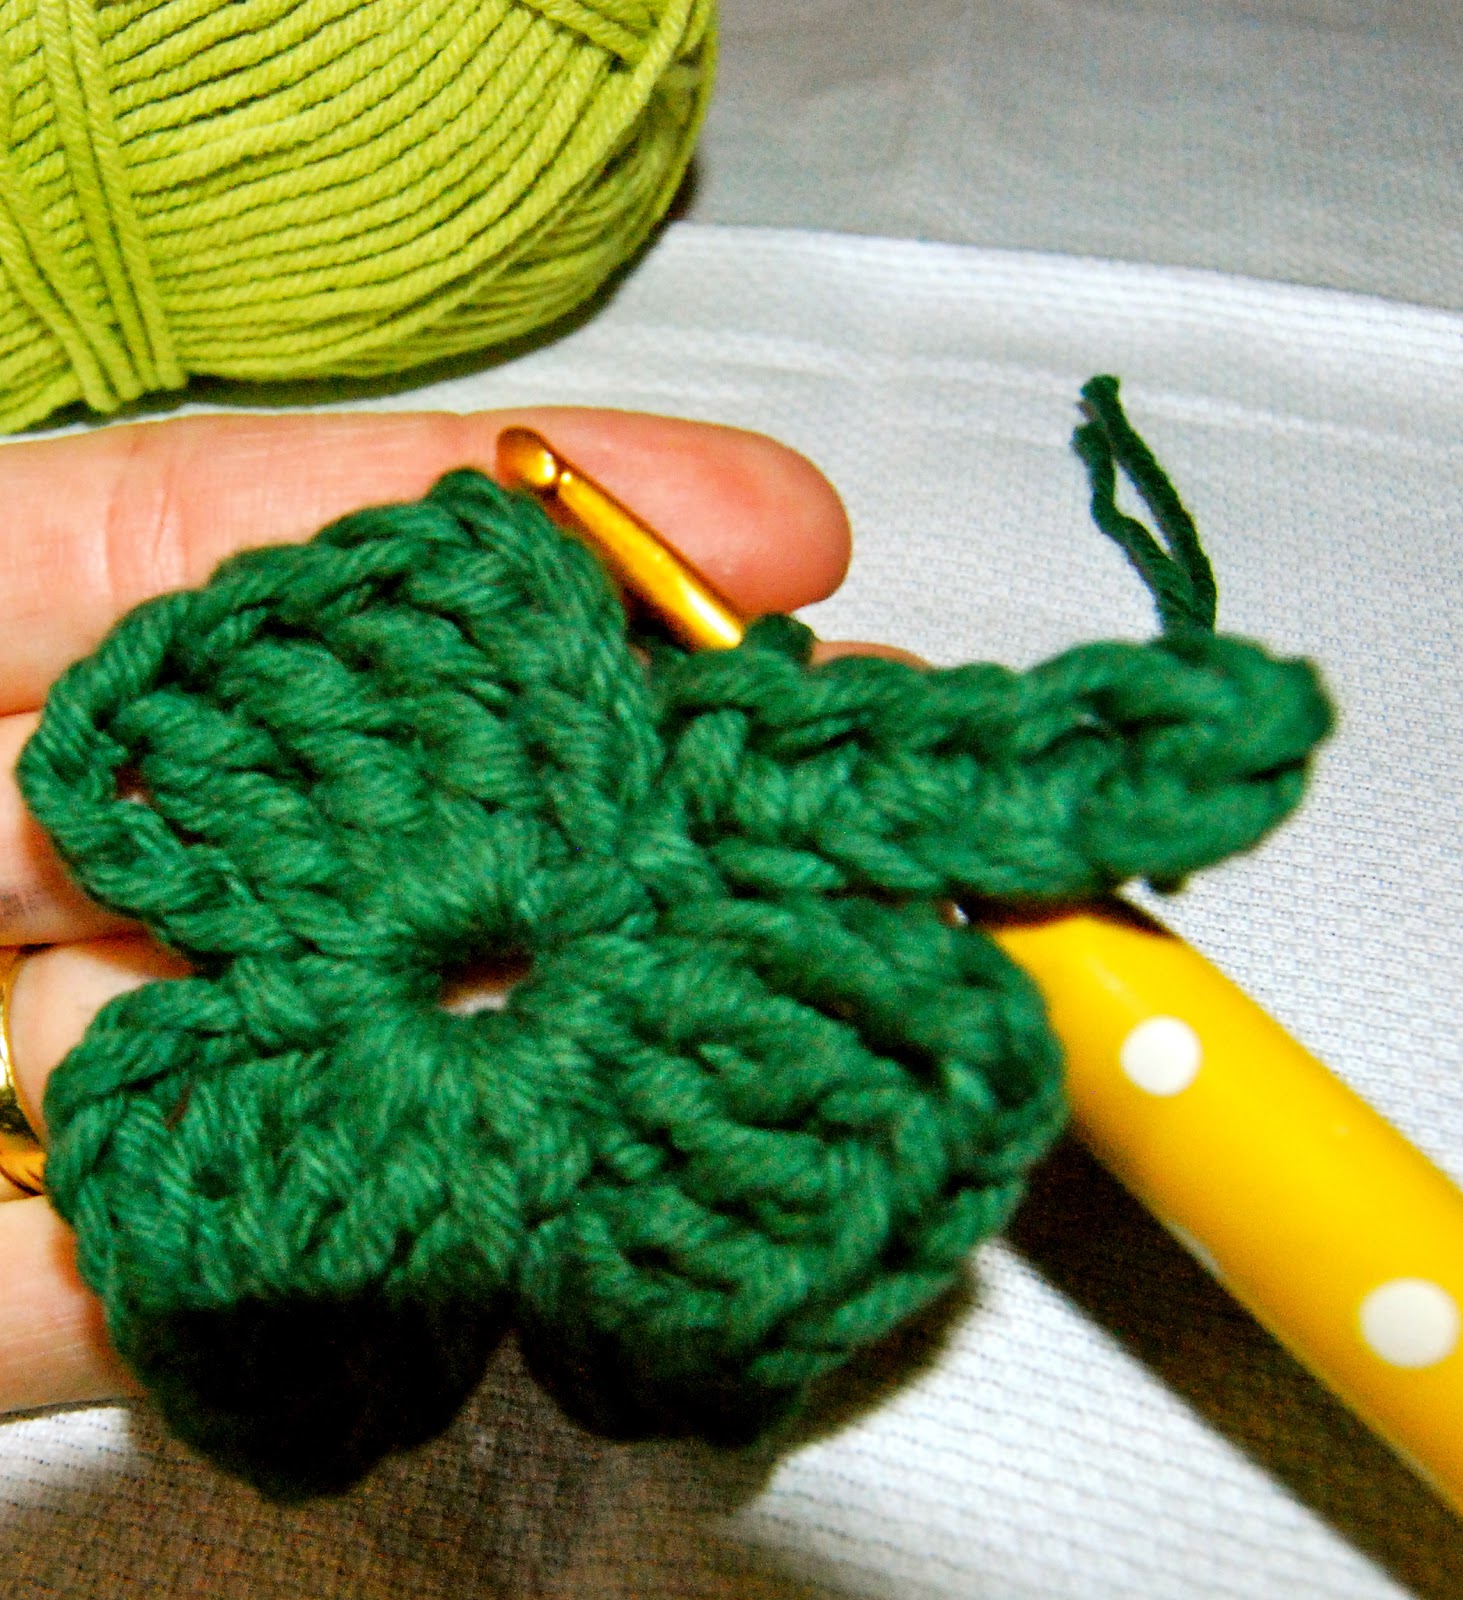


 Leave a 12" tail to sew the pin in the back


Now get ready to make the 2nd row 

With thiner yarn (if you chose to use the crochet thread) or only 1 strand of  cc and smaller (4.00 mm/ US G) hook
sl st 


ch1, 1 sc in each of the 3 ch, 2 sc in each tr, 1 sc in each of the next 4 ch, sl st in the previous row sl st


2 sc in each tr


 1 sc in each of the next 4 ch

 sl st in the previous row sl st


 repeat from * to * 2 more times 

Cut the yarn and tie the 2 ends together in the back side of your work.


Hand sew (or hot glue) with the 12 '' left over yarn, the pin in the back side of the shamrock and ... 

Voila...
You are done...


Isn't this The Luck of the Irish ???


As always I'M SO HAPPY you came to visit me and I hope you have a wonderful, marvelous, LUCKY month.


All photos shown here belong to taciStudio.blogspot.com. I will be happy to share with you as long as you email me to request and  you link back to taciStudio.blogspot.com.
 I appreciate your kindness. 

Sunday, January 20, 2013

Wooly Friend Tutorial

Wooly Friend (Little "Stella") Tutorial
 
Finally, as promised, here is the tutorial to my
"Stella" Sheep
 
I really had fun making this little sheep. I love this kind of projects because you can go from beginning to end in one sitting.
 
 
I had made one for me a while ago and showed my blogging friends TeresaGracie and Betsy ...when they told me another one of our blogging friends, Meredith from www.mereknits-mereknits.blogspot.com would love one of them I immediately thought I was going to make one for her...
 
but then I thought that we all like wool...and naturally like the cute wooly friends who make our wool.
 
That is why the idea of sharing my pattern was born.
I have to be honest and tell you that I have seen many of these in the web and other websites, but when I made mine I didn't have a specific pattern and improvised to get this one.
 
(So while I really like mine this is not, by any means, a professional pattern neither am I a professional pattern writer. So, if you see any mistakes I will be glad to fix it if you send me an email).
 
Here is a picture of Stella when it was done...
 
Here is what you need :
 
Yarn:I used a chunky yarn for the main color(a very hard rug making kind of yarn I got from a friend so I didn't really had a label) any kind really will do it.
and a sports weigh wool for the head and feet.
Hook: Size 5.0 mm - H
Tapestry needle
Basic knowledge of crochet
 
Abbreviations: (US)
Ch: chain
St = stitches
Sl St+ slip Stitch
Sc = single crochet
Hdc = half double crochet
Dc = double crochet = treble (or triple)crochet
 
 
Row 1: Start by making a magic loop.
 ch 2, and 12 dc into the magic loop to make the first cluster = 12 dc
(pull the tail for the magic loop tight to close the loop in the center)
Slst to join to first dc worked


Row 2: Ch2, 1 dc in the same loop
2 Dc in each dc from previous row = 24 dc
Slst to join to first dc worked


Row 3: Ch2, 1 dc in the same loop
*1 Dc in the next Dc, 2 Dc in the next Dc**, repeat from* to **till you get to the end. Make sure you have 36 Dc.


Good job... You are now done with the body of you little sheep.
 
We are now ready to start the head of the sheep.
 
Head: Choose a contrasting color. I used black for mine and brown for Meredith's.
Start by Ch 8, 1 sc in 2nd ch from hook
1 Hdc, 1 Hdc, 1Dc, 1 Tr, 1 Tr. Turn.(you are now doing the other side of the face) Ch 4, Tr 1, Dc 2, Hdc 2, sc 1, ch 1, sc around the face till you get to the corner, ch 10 ( to make the ear) Sc around the head to get to next corner, ch 10 to make the other ear. Sc around the other side of the head. Fasten off. 
You are now done making the head. :)
 

Sorry, I didn't take very good pictures of each step to make the head :(
 
To make the feet:
Feet: Choose the location where you want the feet.
Sc in the space, ch 5, sc in the same space, slst ad fasten off. 
Repeat for the other foot.
Now, with white yarn make 2 eyes and a nose or choose a bead and sew it to the ace to make the expressions you want.


Well, there you go...my very first tutorial. I'm so happy, excited and a bit nervous to push the publish button ...
But the anticipation of sharing it with all of you makes me so happy.
 
Hope you enjoy making one of this wooly friends as much as I did.


PS: Please, remember I am only writing this pattern for fun and in hopes that you enjoy making one also. If you find any mistakes and want to contact me I'll do my best to correct the mistake. In the mean time, I hope you enjoy it and have fun making many friends to my "Stella"  :)
 
Thanks again for stopping by to see me... I do love to hear from you :)